Pom-Pom Wreath: Making and Attaching Yarn Pom-Poms
Make yarn pom-poms in three sizes with a cardboard template or a fork, then tie or glue them onto a wrapped ring, large ones first.

Tutorial at a glance
Materials
- Yarn in three or four colors
- Stiff cardboard for templates and a dinner fork
- Sharp pointed scissors
- Foam ring or flat cardboard ring, about 10 in (25 cm)
- Yarn or fabric strips to wrap the ring
- Glue gun or thick craft glue (optional)
- Ribbon or yarn for the hanging loop
Yarn, a piece of cardboard and sharp scissors are all it takes to make a pom-pom wreath. You wrap yarn around a template, tie it tightly at the center, cut the loops and trim the result into a ball. Repeat in three sizes and three or four colors, then pack the pom-poms onto a ring until none of the base shows.
Most of the effort goes into the pom-poms themselves, and one step decides whether they succeed: the center tie.
What You Need
- Yarn in three or four colors, medium or bulky weight
- Stiff cardboard for templates, plus a dinner fork for the smallest size
- Sharp scissors with pointed tips
- A foam ring or a flat cardboard ring, about 10 in (25 cm) across
- Extra yarn or fabric strips to wrap the ring
- A glue gun or thick craft glue (optional)
- Ribbon or yarn for a hanging loop
Wrap the ring before you start. A covered base means any small gap between pom-poms shows yarn instead of foam or cardboard. The wrapping method is the same one used for a yarn-wrapped foam ring.
Sizes and Templates
Three sizes make the wreath look full. Large pom-poms set the outline, medium ones fill most of the space and small ones plug the gaps. The width of the template decides the size of the pom-pom.
| Size | Template | Finished pom-pom | Job on the wreath |
|---|---|---|---|
| Large | Card 3 in (7.5 cm) wide | About 2.5 in (6.5 cm) | Placed first, evenly spaced |
| Medium | Card 2 in (5 cm) wide | About 1.75 in (4.5 cm) | Fills between the large ones |
| Small | Dinner fork | About 1 in (2.5 cm) | Plugs the last gaps |
Cut each card template as a rectangle a little longer than it is wide. Then cut a narrow slot from the middle of one long edge to just past the center of the card. The slot lets you pass the tie around the middle of the wraps while they are still on the card.
How to Make a Pom-Pom
- Wrap the yarn. Wind yarn around the width of the template, across the slot, keeping the wraps stacked in the middle. Keep going until the bundle is fat and firm. Too few wraps give a floppy, see-through pom-pom.
- Tie the center. Cut a separate length of yarn about 10 in (25 cm) long. Thread it through the slot, around the middle of the wraps, and pull as tight as you can. Knot it twice, turn the bundle over and knot it again on the other side. Leave the tails long.
- Cut the loops. Slide scissors under the loops at one edge of the card and cut through them all, then do the same at the opposite edge. The strands spring out from the tie.
- Trim into a ball. Shake the pom-pom, then snip away everything that sticks out, turning it as you go. Keep the two tie tails out of the way so you do not cut them. Trim more than feels necessary: a dense, round pom-pom comes from cutting back to where the strands are thickest.
For the small size, wrap yarn around the tines of a fork instead, pass the tie through the middle gap between the tines, knot it tightly and slide the bundle off before cutting the loops.
Trim over a tray or a sheet of paper. The clippings are light, they travel, and they should not be left where young children or pets can reach them.

How Many to Make
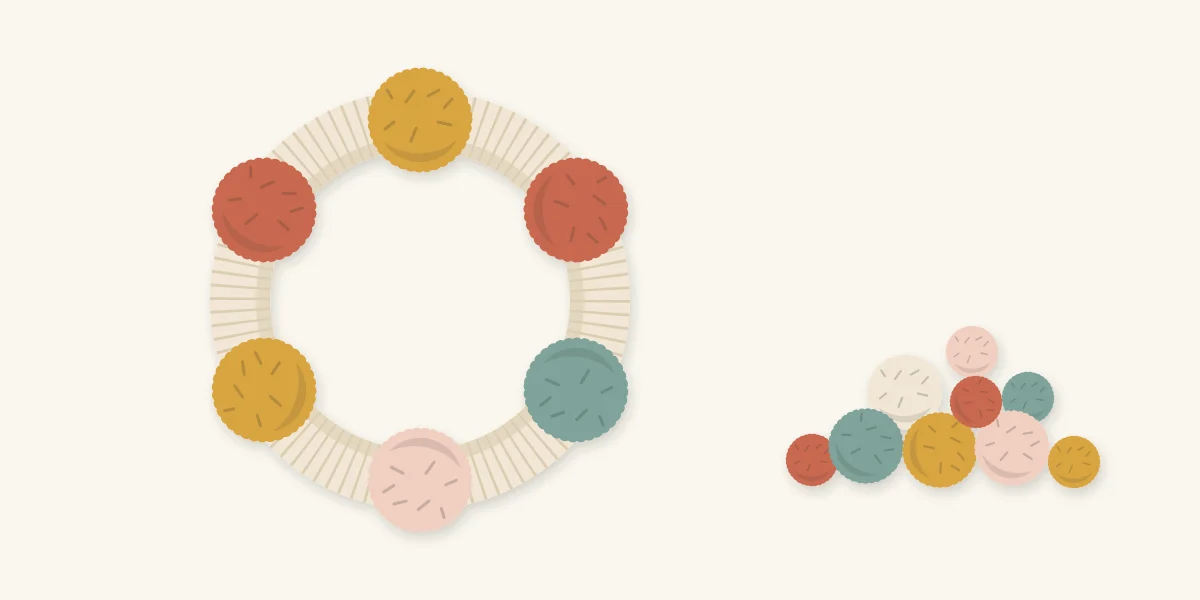
There is no fixed count, because it depends on the ring, the yarn and how hard you trim. As a starting point for a 10 in (25 cm) ring, make about six large pom-poms, then a dozen or so medium and a similar number of small. Lay them on the ring as you go and make more until the base is covered.
Attaching the Pom-Poms
- Place the large ones first. Space about six large pom-poms evenly around the ring. Tie each on by taking its two tails around the ring and knotting them firmly at the back.
- Add the medium ones. Tie them into the spaces between the large pom-poms, pushing them toward the inner and outer edges alternately so the ring looks rounded instead of flat.
- Fill with the small ones. Hold the wreath upright, look for places where the wrapped base shows and tie or glue a small pom-pom into each.
- Tidy the back. Trim the knotted tails short and add a dot of glue to any knot that feels loose.
Tying is the better method on a foam ring because nothing is permanent: you can slide a pom-pom along or untie it. On a flat cardboard ring, glue is easier. Part the strands, put the glue on the tie at the center, and press it onto the base. The guide to attaching materials with glue, wire, picks and pins compares the options in more detail.
Watch out
Glue-gun tips and fresh hot glue burn, and glue soaks through yarn fast. Press pom-poms down with a pencil or a craft stick, not a fingertip.
If Something Goes Wrong
- Strands pull out. The center tie is too loose. It is rarely fixable afterward, so pull the next tie as hard as the yarn allows, and use a strong, smooth yarn for tying if your main yarn snaps.
- The pom-pom looks thin. Add more wraps next time. A thin one can still be trimmed smaller and used as a gap filler.
- Pom-poms droop forward. Retie closer to the base, or add a dot of glue under each one.
Hanging and Displaying It
Tie a ribbon or yarn loop around the ring at the top before the last few pom-poms go on, so they hide it. The finished wreath is wider than its ring: on a 10 in (25 cm) base it comes to about 13 in (33 cm) across. For nail-free options on doors, walls and mirrors, see the guide on how to hang a wreath.
This wreath belongs indoors. Yarn holds moisture and dust, and its colors change in strong sun. Hang it out of reach of young children and pets, since loose fibers and small pom-poms are a choking hazard, and keep it away from candles, heaters and bulbs.
Frequently asked questions
Why do my pom-poms fall apart?
The center tie is almost always the cause. Tie it with a separate length of strong yarn, pull it as tight as you can, and knot it on both sides of the bundle before cutting the loops. Too few wraps also leave the tie with little to grip.
Can pom-poms be made without a pom-pom maker?
Yes. A rectangle of stiff cardboard with a slot cut to the center works for large and medium sizes, and a dinner fork works for small ones. The width of the card or fork sets the size of the pom-pom.
Is it better to tie or glue pom-poms to the wreath?
Tying with the long tails of the center tie is adjustable and leaves the base reusable, so it suits foam rings. Glue is quicker for small gap fillers and for flat cardboard rings. Many wreaths use both.