Yarn-Wrapped Wreath: Covering a Foam Ring Evenly
Wrap a foam ring in bulky yarn with snug, side-by-side turns, change color on the back and finish with a small cluster of felt leaves and flowers.
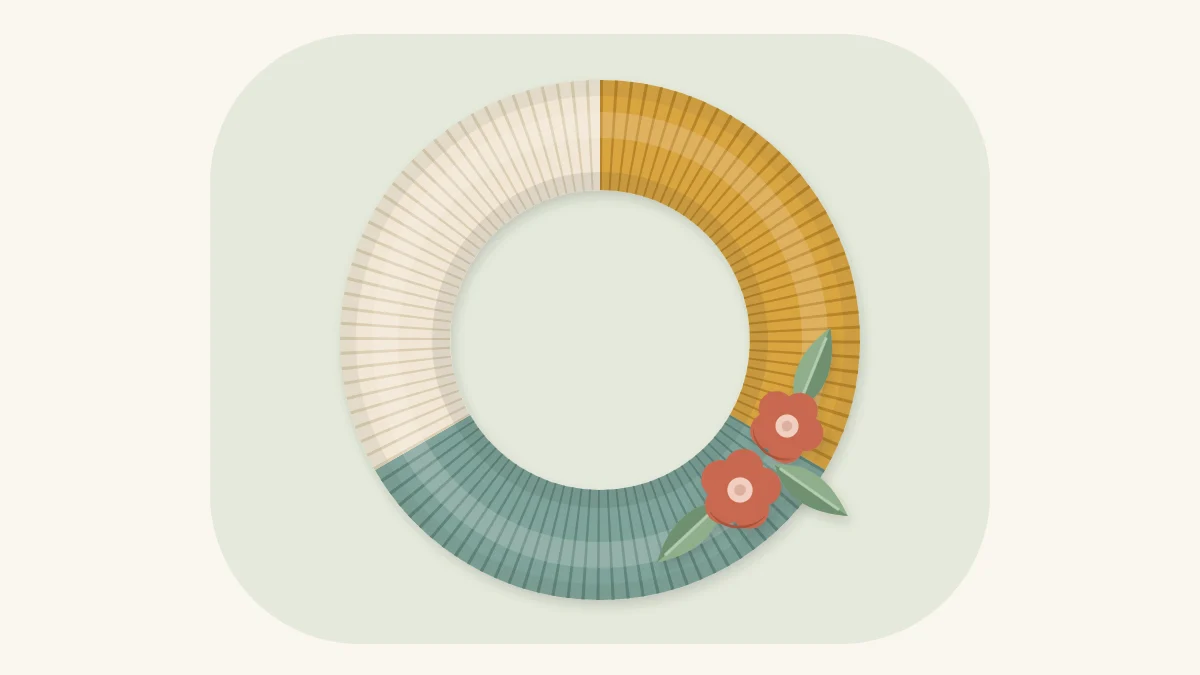
Tutorial at a glance
Materials
- Foam ring, 10 to 12 in (25 to 30 cm)
- Bulky yarn in two or three colors
- Scissors
- Straight pins
- Felt in two colors
- Low-temperature glue gun or thick craft glue
- Ribbon or yarn for the hanging loop
The whole skill in a yarn-wrapped wreath is keeping the wraps snug and side by side, so the foam ring ends up covered in smooth, even ridges with no white showing through. There is nothing to cut to size and very little glue. You wind yarn around the ring, change color when you like, and finish with a small cluster of felt leaves and flowers.
It is a calm, repetitive project, and mistakes are easy to undo: unwind a few turns and wrap them again.
What You Need
- A foam ring, 10 to 12 in (25 to 30 cm) across, with a rounded or half-round profile
- Bulky yarn in two or three colors
- Scissors
- A few straight pins
- Felt in two colors for the leaves and flowers
- A low-temperature glue gun or thick craft glue
- Ribbon or yarn for a hanging loop
Bulky yarn covers the ring quickly and hides small unevenness. Thinner yarn works too, but it needs many more turns and shows every gap. A smooth yarn gives clear parallel lines, and a fuzzy one blurs them. If you are still deciding between foam and other rings, see the guide to choosing a wreath base.
Plan the Color Blocks
Two or three colors are plenty. Decide roughly how much of the ring each one covers before you start, because unequal blocks look more deliberate than three equal thirds.
| Layout | Colors | Effect |
|---|---|---|
| One color | All mustard | Plain background for the felt cluster |
| Half and half | Mustard and cream | Bold, simple contrast |
| Three unequal blocks | Mustard, cream, blue-green | Relaxed and modern |
Mark the block boundaries lightly on the back of the foam with a pencil. The marks disappear under the yarn and save you from guessing halfway around.
Wind a Small Ball First
A full skein will not pass through the middle of the ring, and pulling a long loose end through on every turn tangles fast. Wind off a ball about the size of a small orange for each color block. It should drop through the center hole easily. When it runs out, wind another and join it on the back the same way you change color.
How to Wrap the Ring
- Lay the tail along the ring. Place the yarn end flat against the foam, pointing in the direction you are about to wrap. Hold it with a thumb, or with a pin pushed in at the back.
- Wrap over the tail. Take the yarn around the ring and across the tail so the first few turns trap it. Once several turns sit over the tail, it holds without a knot and leaves no bump.
- Continue with side-by-side wraps. Pass the small ball through the center of the ring on each turn. Lay each wrap against the last one, touching but not overlapping, and pull it snug.
- Push the wraps together. After every few turns, slide the wraps back toward the finished section with a thumbnail to close any gaps.
- Fill the outer edge. The outside of the ring is longer than the inside, so wraps that touch on the inner edge spread apart on the outer edge. When a gap opens there, make one turn that sits slightly on top of its neighbor on the inside.
- Finish the last block. When you reach the start, cut the yarn, tuck the end under several wraps on the back and fix it with a dot of glue.
Snug means firm enough that the yarn does not slide when you rub it, not so tight that it dents the foam. Yarn pulled too hard also stretches thin and lets the base show.

Changing Color on the Back
Stop the old color with the yarn at the back of the ring and cut it, leaving a tail about 4 in (10 cm) long. Knot the new color to that tail with a small firm knot that rests against the back of the foam. Lay both tails flat along the back, in the direction you are wrapping, and cover them with the next turns of the new color.
From the front, the change should be a clean line where one color stops and the next begins. If the knot creeps around to the side, unwind a turn and reposition it before you carry on.
Tip
Decide which face of the ring is the back before the first turn and mark it with a pin. Every start, join and finish then lands on the same side.

Add the Felt Leaves and Flowers
Keep the decoration small so the wrapping stays the main feature. Two small flowers and three leaves grouped on the lower right is enough. Cut simple pointed leaves about 2 in (5 cm) long, and make the flowers as small rolled spirals. The method is explained step by step in the felt flower wreath with rolled roses.
Arrange the pieces on the ring without glue first. Fix the leaves, then set the flowers on top so they hide the leaf bases. Glue to the yarn, not to bare foam.
Watch out
Glue-gun tips and fresh glue burn, and very hot glue can melt some foam. Use a low-temperature gun, keep fingers clear, and press pieces down with a scrap of felt.
Common Problems
- Foam shows on the outer edge. Slide the wraps together and add an extra turn. Avoid stretching the yarn to make it reach.
- Ridges and lumps. Wraps have crossed over each other. Unwind back to the first crossing and lay them flat again.
- Loose wraps that slide. Rewind with a little more tension, or run a thin line of craft glue along the back of the foam before wrapping that section.
Hanging and Variations
Tie a loop of ribbon or matching yarn around the top of the ring and slide the knot to the back. Foam and yarn weigh very little, so a small hook is usually enough; still, check the hook maker’s weight rating and surface instructions.
This is an indoor wreath. Yarn absorbs moisture and its colors shift in direct sun, so choose a dry wall away from windows that get strong light, and keep it clear of candles, heaters and bulbs. For more texture, cover the same wrapped ring with yarn balls as described in the pom-pom wreath tutorial.
Frequently asked questions
How much yarn does it take to wrap a foam wreath ring?
It varies with the thickness of the yarn, the thickness of the foam and how tightly the wraps sit, so there is no single figure. Bulky yarn uses far fewer turns than thin yarn. Have extra on hand and plan the color blocks so a shortage in one color can be covered by another.
Do the yarn wraps need glue to stay in place?
Usually not. Snug wraps that sit side by side hold each other, and the tails are trapped under the turns. A dot of glue on the final tucked end is enough, and a thin line of craft glue on the back helps only if the yarn is very slippery.
Why does the foam show through on the outside of the ring?
The outer edge of the ring is longer than the inner edge, so wraps that touch on the inside spread apart on the outside. Push the wraps together regularly and add an occasional turn that overlaps slightly on the inner edge.

