Crescent Grapevine Wreath with Faux Florals
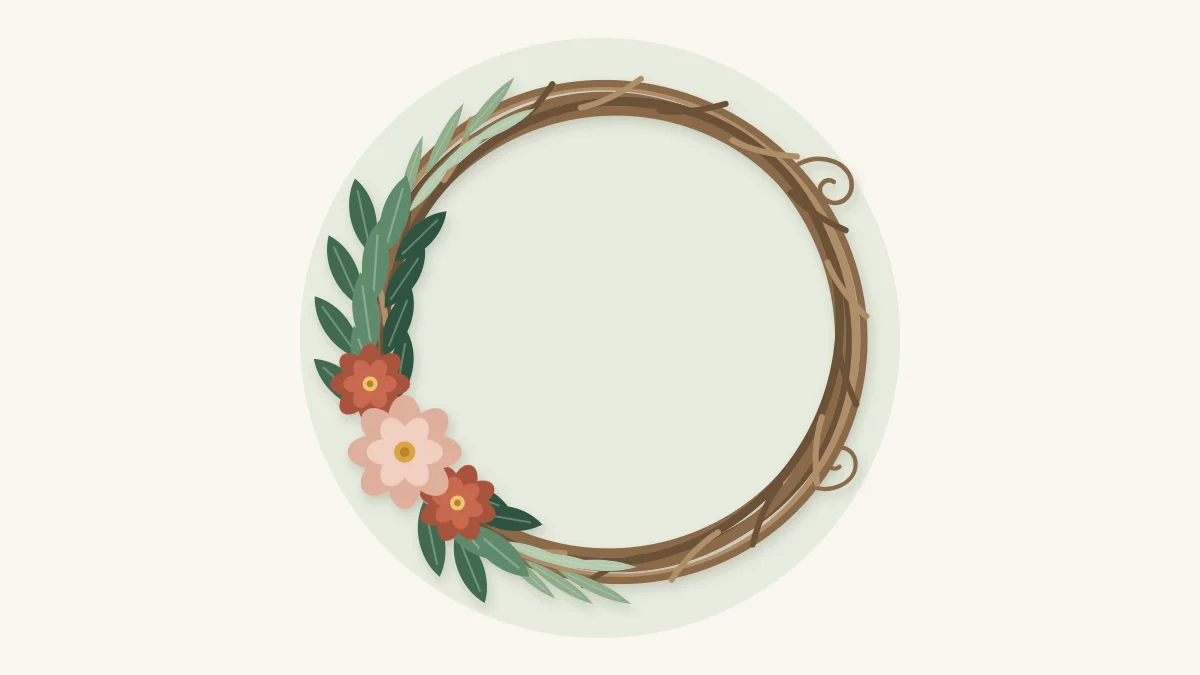
An asymmetrical crescent that covers about half of a grapevine base: thin greenery at the tips, fuller toward the center, and three focal flowers set slightly off center.
Tutorial at a glance
Materials
- 14 in (36 cm) grapevine base
- Two long thin faux greenery stems, about 10 in (25 cm)
- About 6 shorter faux greenery pieces
- Three faux focal flowers, one large and two smaller
- Small faux filler sprigs
- Thin floral wire and wire cutters
- Hot glue gun and glue sticks
On a crescent grapevine wreath, the decoration covers only about half of the ring. It starts as a thin point, swells to its fullest near the middle and thins out again, like a new moon laid along the vine. The other half of the base is left bare, and that empty space is what makes the flowers stand out.
The shape looks relaxed, but it depends on a few deliberate choices: where the two tips end, where the fullest point sits, and how gradually the material builds between them. This project uses a 14 in (36 cm) grapevine base with faux greenery, three focal flowers and a little filler. A 16 in (41 cm) base works the same way with slightly longer stems.
What You Need
- One 14 in (36 cm) grapevine base
- Two long, thin faux greenery stems for the tips, about 10 in (25 cm) each
- About 6 shorter, fuller greenery pieces, 5 to 7 in (13 to 18 cm)
- Three faux focal flowers: one large, two smaller
- A few small filler sprigs
- Thin floral wire, wire cutters and a hot glue gun
Use an odd number of focal flowers. Three flowers form a loose triangle that the eye reads as one group, while two or four tend to pair off and look stiff.
Map the Crescent
Lay the base flat with the top away from you. The crescent in this example runs down the left side, from the upper left to the bottom of the ring. Mark the two tips with a twist of wire or a clothespin so you can see the span before anything is attached. About half the ring between the marks is right.
Next mark the focal point. Put it slightly below the middle of the crescent, not exactly halfway between the tips. An off-center focal point looks more natural, and placing it lower gives the wreath visual weight near the bottom, where it hangs calmly. The thinking behind this is explained in the guide to balanced wreath composition.

Build from the Tips to the Center
Stems are tucked between the vines along the direction of the twist, then wired. If you have not worked on this kind of base before, the basic tucking method is in the guide to decorating a grapevine wreath.
- Set the two tips. Take the two long, thin stems. Tuck one so it points up toward the upper mark and the other so it points down and around toward the lower mark. Their cut ends meet near the focal point and the stems point away from each other. Wire each one to a vine near its cut end. These two stems draw the outline of the whole crescent.
- Add fuller greenery toward the center. Tuck the shorter, fuller pieces on top of the first two, each one starting closer to the focal point than the last. Keep every piece pointing the same way as the tip on its side. The greenery should get denser and wider as it approaches the focal point, with nothing new added in the last few inches of each tip.
- Place the three flowers. Set the large flower at the focal point first. Add the two smaller flowers close to it, one a little above and to one side, one a little below, so the three do not line up. Push the stems deep into the vines, with a dot of hot glue on each stem and a wrap of wire behind where the base allows it.
Finish with filler. Tuck small sprigs around the flowers and let one or two trail a short way along each arm of the crescent, getting sparser as they go.
Watch out
Hot glue and the gun tip burn, and glue can drip through the gaps in a grapevine base. Work over a protected surface and bend cut wire ends back into the vines.

Keep the Tips Thin
The taper is what separates a crescent from a half-covered ring. Each tip should end in a single slender stem, with the vine clearly visible beside it. If the tips look heavy, do not shorten the arms. Instead, pull out or trim the leaves nearest the ends, and move any full pieces closer to the center.
| Zone | Material | Fullness |
|---|---|---|
| Tips | One long thin stem each | Sparse, vine showing |
| Arms | Shorter greenery, a little filler | Building gradually |
| Focal point | Three flowers, filler, fullest leaves | Dense, no vine showing |
Check the Balance as You Work
A crescent is heavier on one side by design, so a wreath that looks level on the table can swing when it hangs. Hang it on a hook or a nail in the workroom after the greenery is on, and again after the flowers. Step back and check whether the ring has rotated and whether the curve flows without a bump.
If the wreath rotates, do not fight it with more material on the bare side. Move the hanging point instead. Shift the hanging loop along the top of the ring toward the decorated side until the crescent settles where you planned it, then fix the loop there.
Tip
Wire everything first and glue only after the hanging check. Wired stems can still be slid along the vine; glued ones cannot.
Common Problems
- It looks like half a full wreath. The fullness is even from end to end. Thin the arms and concentrate material at the focal point.
- The flowers look pasted on. Add filler and a few leaves in front of and between them so they sit in the greenery, not on top of it.
- A stem sticks out of the curve. It was tucked across the twist. Pull it and slide it in again along the vine.
Hanging and Variations
Hang the finished wreath in a covered spot and follow the weight rating of whatever hook you use. Sun, rain and humidity change faux flowers and vine over time, so a sheltered door or an indoor wall is the better choice. Keep it away from candles and heat sources.
The crescent can run along the bottom of the ring, with both tips pointing upward, or along the right side as a mirror image. If you would like the same flowers in a ring with no bare space at all, the faux flower wreath on a foam base covers the full version.
Frequently asked questions
How much of the wreath should a crescent cover?
About half of the ring is a good target. Much less than that reads as a small cluster, and much more starts to look like a full wreath with a gap. Mark the two tips on the bare base before attaching anything so you can judge the span.
Where do the flowers go on a crescent wreath?
Place them at the fullest part of the crescent, slightly off center instead of exactly halfway between the tips. Putting the group a little below the middle gives the wreath visual weight near the bottom. Use an odd number, such as one large flower and two smaller ones.
Why does my crescent wreath hang crooked?
The decorated side is heavier, so the ring turns until that side sits lower. Hang the wreath during the work to see where it settles. Then move the hanging loop along the top toward the decorated side until the crescent sits where you planned.

